Unfortunately the bad weather prevented us from accomplishing too much last weekend- not to mention we were also still recovering from the 4th.
But here are a few quick updates..
The mudroom is almost done! All that's left is caulking, sanding and painting. Since we're expecting lots of fun visitors for the next couple of weeks I'm afraid it's unlikely I'll be posting the completion pictures anytime soon. But here are some good shots from this past weekend..
This time I'll admit I didn't help much. The mudroom was tight (and hot) so Ben got to work on facing the boxes while I started caulking other rooms in the house.
I didn't take pictures of the caulking- it's one of those things that's tedious and not much fun at all, but still has to be done! For some reason we hadn't gotten around to doing the bathroom or a corner in the living room where the base molding was replaced, so I decided to suck it up and just finish it!
Henry was exhausted by the time Ben was done!
Some pictures of the almost final product..
The corner unit
The back unit
And one last update to share (one I'm particularly proud of).. we have the beginnings of yellow cherry tomatoes!
Wednesday, July 14, 2010
Tuesday, July 6, 2010
the mudroom.. a sneak peek
If only our calendar called for three day weekends every week..
We did absolutely no relaxing this fourth- we were way too busy tackling one of our major "to-dos"- the mudroom built-ins. I think we're both totally exhausted and the work week has just begun!
When we first moved into our house there was a teeny-tiny underutilized space right off of the kitchen that we immediately started calling the mudroom. Perhaps you remember it from this previous post.
It does have a door that leads outside, though we never really use it to get in and out of the house. Instead I had high hopes of turning it into a catch-all space- think outerwear storage, recycling center and dog treat mecca! Before our kitchen was even installed I had drawn up a plan of what our mudroom should look like- though with all of the other house projects to complete I had no expectations about when we would actually start to tackle it.
But low and behold last weekend I convinced Ben to put aside the mantle work and move onto something bigger.. so we started to "pre-cut" all of the boards, thinking it would help speed up the installation process scheduled for the long weekend.
Pre-cut is in parenthesis simply because everything obviously had to be cut again before it was installed- about ten minutes into the job both Ben and I agreed it all would have been a lot easier if at least one of us was decent at math. Thank goodness for construction calculators (is that what they're called?)
Anyway.. on Saturday Ben cleared out the mudroom and we started putting everything together. Little side note: I'm very aware that in all of the pictures it looks like Ben does all of the work with me on the sidelines snapping pictures and drinking margaritas, but that definitely is not the case. It may surprise those who know me but I actually have learned to operate a jigsaw and am very handy with a nail gun.
I had designed two pieces- one to run the entire length of the back wall and one to sit in the front left hand corner. A little diagram to help..
Back Unit
So for both units we started with a base.. The ceiling height in the mudroom is 8'4" so we built up 4" to start.
We opted to use wainscoting for the back and literally just attached it to the wall- as we were putting it all up Ben mentioned there was no taking it down unless we wanted the walls to come down with it.
With the paneling up we started building the structure..
Like most old homes we had a few sloping floor/wall problems. But nothing that couldn't be hidden with a little extra trim!
The wainscoting panel below the upper shelves is for lots of hooks- we desperately needed coat storage.
And the not quite finished shot.. we still have to add a 2" face to the outside edges of everything- then we'll caulk and I'm painting everything dark. But what I'm most excited for is filling them up. Here's a little taste of what's going inside them..
With the main piece done we only had the corner shelves left to do..
Corner Unit
We had planned on building in that corner anyway, so it wasn't a big deal to "mask" the lack of flooring. This time around while we opted to go triangular again we decided to do full height open shelves instead.
Because the floor had to be built up before we even installed the base there was a little bit of an extra step..
We installed the wainscoting again..
And started placing shelves where we wanted them..
Again we still have to install the face, but it's still a huge improvement over what was there..
We still have to finish up the window and door casings- maybe we'll get to it this week. I'm hoping next weekend we'll face everything, caulk and then I can get painting!
We did absolutely no relaxing this fourth- we were way too busy tackling one of our major "to-dos"- the mudroom built-ins. I think we're both totally exhausted and the work week has just begun!
When we first moved into our house there was a teeny-tiny underutilized space right off of the kitchen that we immediately started calling the mudroom. Perhaps you remember it from this previous post.
It does have a door that leads outside, though we never really use it to get in and out of the house. Instead I had high hopes of turning it into a catch-all space- think outerwear storage, recycling center and dog treat mecca! Before our kitchen was even installed I had drawn up a plan of what our mudroom should look like- though with all of the other house projects to complete I had no expectations about when we would actually start to tackle it.
But low and behold last weekend I convinced Ben to put aside the mantle work and move onto something bigger.. so we started to "pre-cut" all of the boards, thinking it would help speed up the installation process scheduled for the long weekend.
Pre-cut is in parenthesis simply because everything obviously had to be cut again before it was installed- about ten minutes into the job both Ben and I agreed it all would have been a lot easier if at least one of us was decent at math. Thank goodness for construction calculators (is that what they're called?)
Anyway.. on Saturday Ben cleared out the mudroom and we started putting everything together. Little side note: I'm very aware that in all of the pictures it looks like Ben does all of the work with me on the sidelines snapping pictures and drinking margaritas, but that definitely is not the case. It may surprise those who know me but I actually have learned to operate a jigsaw and am very handy with a nail gun.
I had designed two pieces- one to run the entire length of the back wall and one to sit in the front left hand corner. A little diagram to help..
Back Unit
So for both units we started with a base.. The ceiling height in the mudroom is 8'4" so we built up 4" to start.
We opted to use wainscoting for the back and literally just attached it to the wall- as we were putting it all up Ben mentioned there was no taking it down unless we wanted the walls to come down with it.
With the paneling up we started building the structure..
Like most old homes we had a few sloping floor/wall problems. But nothing that couldn't be hidden with a little extra trim!
The wainscoting panel below the upper shelves is for lots of hooks- we desperately needed coat storage.
And the not quite finished shot.. we still have to add a 2" face to the outside edges of everything- then we'll caulk and I'm painting everything dark. But what I'm most excited for is filling them up. Here's a little taste of what's going inside them..
With the main piece done we only had the corner shelves left to do..
Originally the mudroom had a small corner cabinet (pictured below).
It felt like unusable space to us- I didn't think I'd really be able to fit anything in it, not to mention we were planning on gutting the room anyway to insulate the walls so we had no choice- it had to come down. But when the corner cabinet was removed we discovered there was actually no hardwood installed underneath it- it truly was built into the room.We had planned on building in that corner anyway, so it wasn't a big deal to "mask" the lack of flooring. This time around while we opted to go triangular again we decided to do full height open shelves instead.
We installed the wainscoting again..
And started placing shelves where we wanted them..
Again we still have to install the face, but it's still a huge improvement over what was there..
It felt like as soon as we were done the weekend was over!
Wednesday, June 23, 2010
the garden
At least somethings benefiting from all of this rain! We have a wet basement, but I can look past that since we have a few cherry tomatoes coming in..
Monday, June 14, 2010
let there be light
Finally we installed some light fixtures! It's amazing what you get done inside when the weather is crummy. Ok so we didn't really accomplish that much- our workspace (aka the driveway) was rained out, but considering these light fixtures have been sitting around the house for 5 months, it felt like a lot more. I'm just thankful we don't have to jump over the boxes anymore..
We had to swag the bathroom fixture to allow clearance for the medicine cabinet to open..
A few touchups are needed but I'll get around to that.. eventually.
And it's amazing what a difference the sconces make in the living room. They're a huge improvement over the holes in the wall I've grown so used to. Not to mention the extra light was needed.
Next up we'll be installing the real mantel- I wrapped the old one in burlap because I just couldn't bear to look at the mint green molding anymore.
Friday, June 4, 2010
for sale..
We're looking to sell Ben's Ford F150- if you've been following the blog I'm sure you've seen all the pictures.
It's a 2006 with 68,400 miles, new brakes and new tires. 4 wheel drive, regular cab in good, clean condition. $15,000 or best offer
Thursday, June 3, 2010
garden update
It's actually growing!
Of course all of this is somewhat temporary as I keep hoping (crossing fingers again) that we are able to pour the new concrete front steps/patio sometime soon, though it's looking like that may have to wait at least another year.
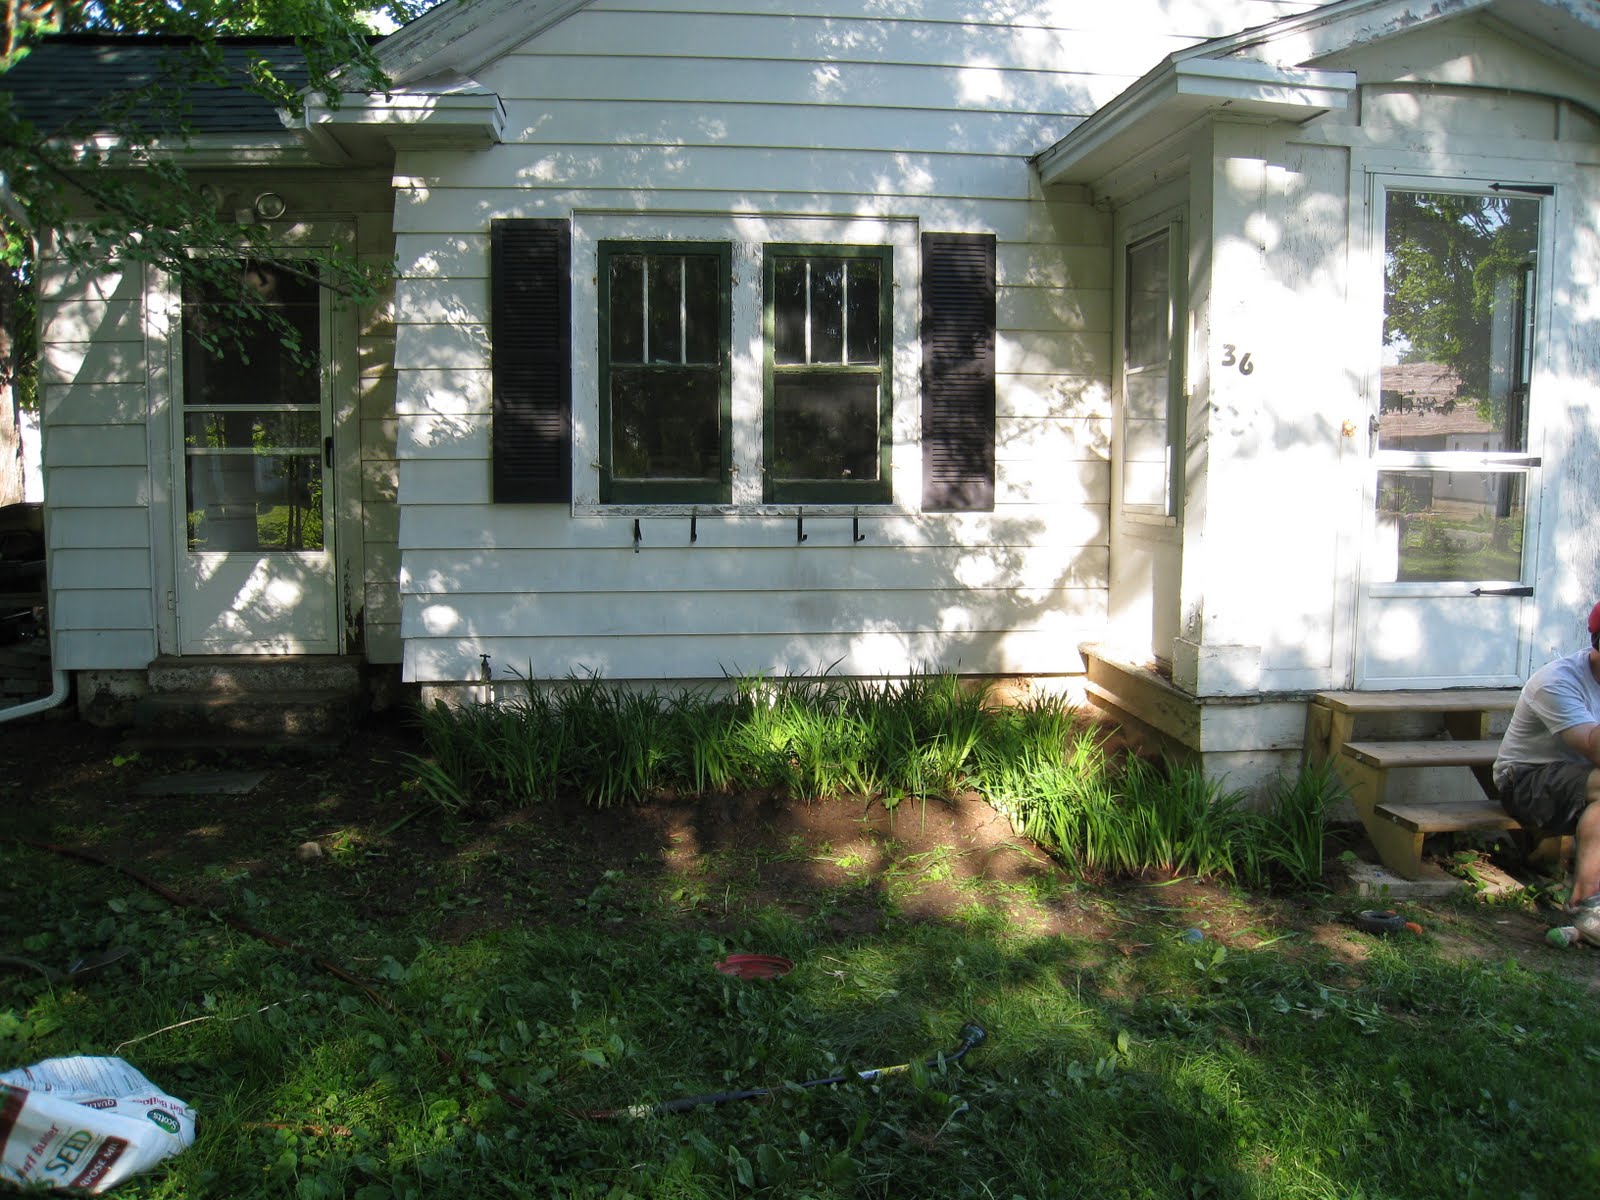
I also wanted to post a few "after" pictures of the front of the house. Not only were we able to relocate all of the lilies, but we also added a little stone to finish it off.
Of course all of this is somewhat temporary as I keep hoping (crossing fingers again) that we are able to pour the new concrete front steps/patio sometime soon, though it's looking like that may have to wait at least another year.
Tuesday, June 1, 2010
and the landscaping continues..
We've spent the last few weeks clearing out the yard even more (yet there's still lots to do), planting a little in hopes that we'll be able to enjoy the fruits of our labor next year, and most importantly we've been taking advantage of our outdoor space. Because we've spent the last five summers in New York City traffic (like most New Yorkers we left the city every weekend and without fail got caught on the FDR for hours at a time) we are thrilled to be able to avoid major roads, stay home and still get to enjoy the warm weather, smell of fresh cut grass and hamburgers on the grill. So with that goal in mind we worked our bottoms off trying to get everything ready for the unofficial start of the summer- Memorial Day Weekend.
Our "Privacy" Bushes
Our plan was always to plant along Division Street- in hopes that obstructing Henry's view might bring a little peace and quiet to the neighbors- as much as I'm sure they all enjoy his following them along the perimeter of our lawn barking (more like screeching) along the way. We opted to go with round arborvitaes- just to be a little different..


I could joke about how you can barely even see the house anymore (I tend to joke about it with Ben all too often), but we're crossing our fingers they'll grow very quickly.. for the neighbors' sake!

The Patio
The patio turned out to not actually be a disaster. Can you believe it? Once we got our furniture on and grass started to grow in between the pavers, it started taking shape. I'm looking forward to seeing what it looks like at the end of the summer and whether or not the grass will just take over (there's a lot of finger crossing at our house). If all goes according to plan the patio will stay, but we're open to re-doing it next spring if need be.
You'll notice above, Ben also planted three of the arborvitae's around the patio (two in the back and one to the left).
The Lily Garden
Originally the yard had a random lily garden in the middle of the yard. Ben tried to kill it a few times in hopes of growing normal grass, but it didn't work. So instead we opted to dig them out and plant them in front of the house.


It took a lot of time and energy, but it was worth it- even if it's temporary.
The Vegetable Garden
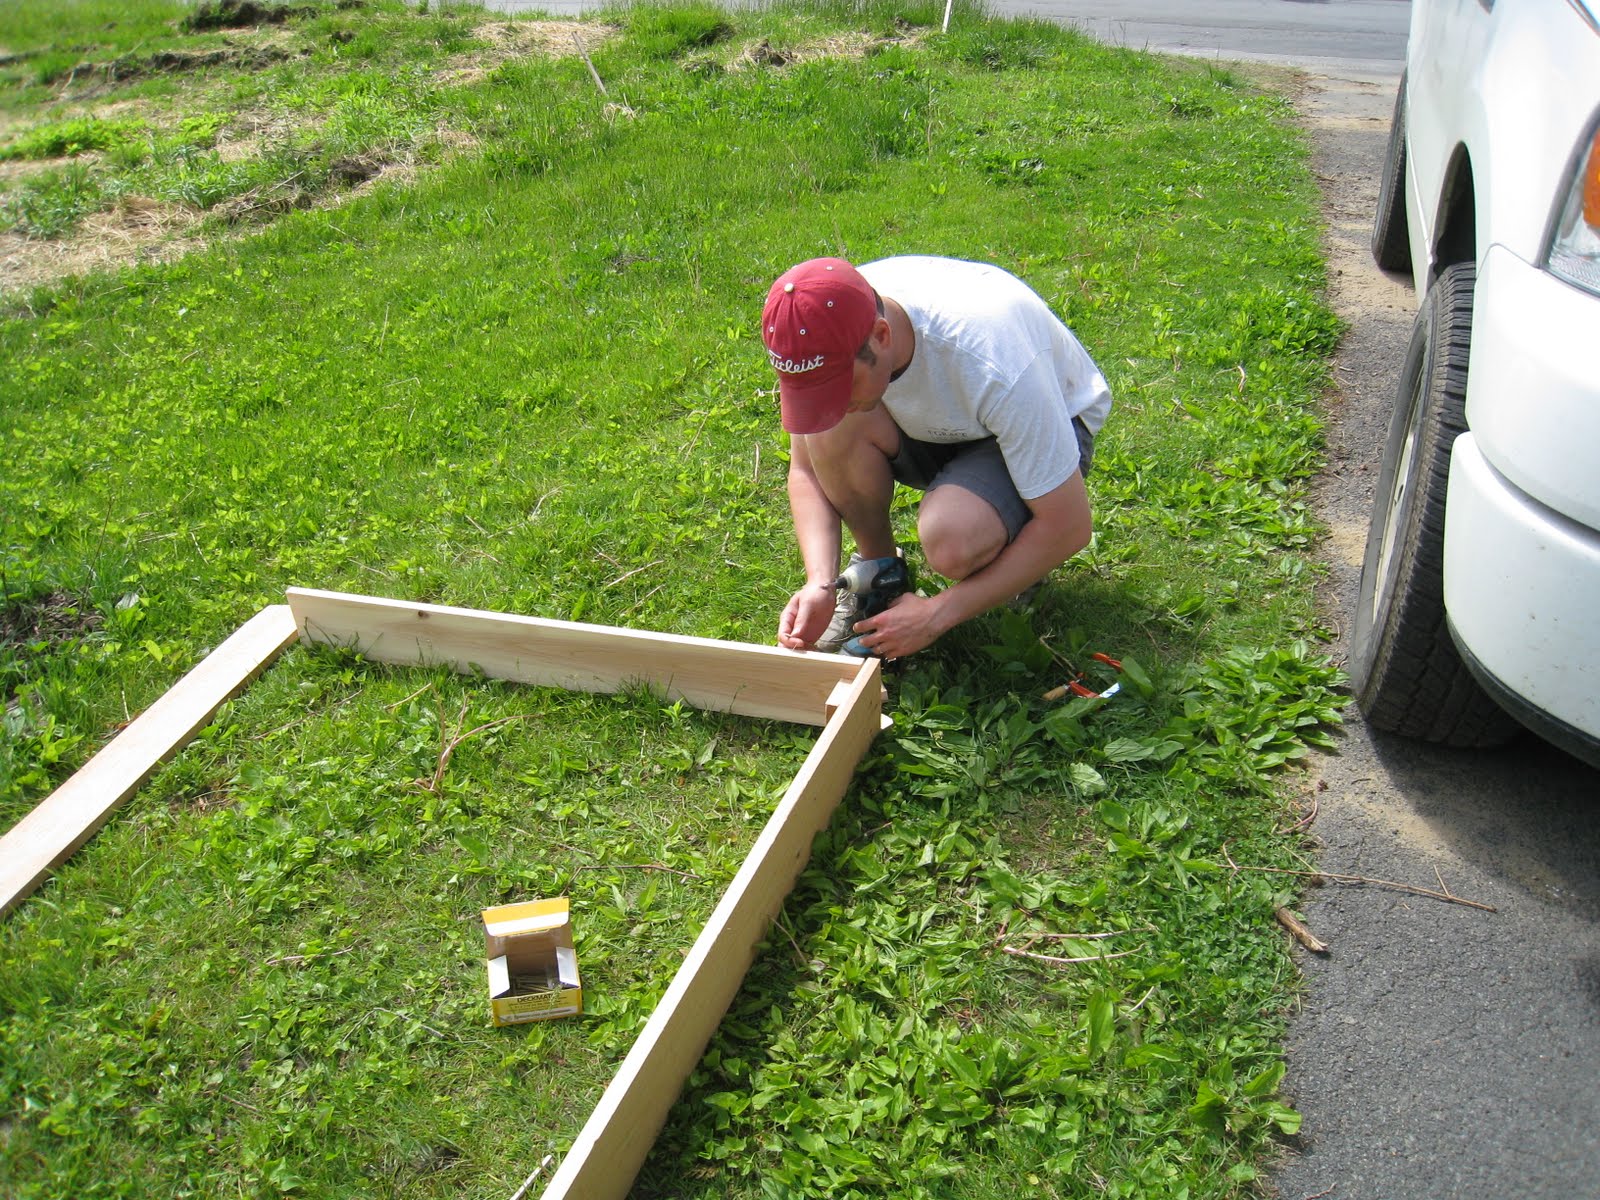
My vegetable garden has become my pride and joy. I call it mine because Ben says it's my responsibility- I think he's worried that I'm going to just give up on it if I don't see any vegetables growing after a few weeks time. I'm sure he's right, but at the moment it's growing so I'm loving it and the fact that I actually did something right! We opted to go with a raised bed because we weren't sure if anything would really grow in our dirt. So Ben built the frame and then we positioned it in the best area with the most light.


I got rid of the weeds and grass underneath and started filling it with lots of different stuff..


Finally I planted all 15 varieties of fruits and vegetables and Ben offered to water for me..
I decided to plant tomato plants instead of seeds (maybe next year I'll get gutsy and go with the seeds), but everything else I planted was seeds.
Everything has grown a lot in the last few days- I'll keep posting updates, but in the meantime I'm hoping this weekend we'll get back to the interior of the house before we start scraping and painting the exterior. I'd love to get the rest of the trim work installed and painted and start working on the doors before all of our guests start arriving for track season!
Our "Privacy" Bushes
Our plan was always to plant along Division Street- in hopes that obstructing Henry's view might bring a little peace and quiet to the neighbors- as much as I'm sure they all enjoy his following them along the perimeter of our lawn barking (more like screeching) along the way. We opted to go with round arborvitaes- just to be a little different..
I could joke about how you can barely even see the house anymore (I tend to joke about it with Ben all too often), but we're crossing our fingers they'll grow very quickly.. for the neighbors' sake!
The Patio
The patio turned out to not actually be a disaster. Can you believe it? Once we got our furniture on and grass started to grow in between the pavers, it started taking shape. I'm looking forward to seeing what it looks like at the end of the summer and whether or not the grass will just take over (there's a lot of finger crossing at our house). If all goes according to plan the patio will stay, but we're open to re-doing it next spring if need be.
The Lily Garden
Originally the yard had a random lily garden in the middle of the yard. Ben tried to kill it a few times in hopes of growing normal grass, but it didn't work. So instead we opted to dig them out and plant them in front of the house.
It took a lot of time and energy, but it was worth it- even if it's temporary.
My vegetable garden has become my pride and joy. I call it mine because Ben says it's my responsibility- I think he's worried that I'm going to just give up on it if I don't see any vegetables growing after a few weeks time. I'm sure he's right, but at the moment it's growing so I'm loving it and the fact that I actually did something right! We opted to go with a raised bed because we weren't sure if anything would really grow in our dirt. So Ben built the frame and then we positioned it in the best area with the most light.
I got rid of the weeds and grass underneath and started filling it with lots of different stuff..
Finally I planted all 15 varieties of fruits and vegetables and Ben offered to water for me..
Everything has grown a lot in the last few days- I'll keep posting updates, but in the meantime I'm hoping this weekend we'll get back to the interior of the house before we start scraping and painting the exterior. I'd love to get the rest of the trim work installed and painted and start working on the doors before all of our guests start arriving for track season!
Subscribe to:
Posts (Atom)