Ben and I were in Saratoga over the weekend (very briefly) and we got to experience actually walking on the floors!
Remember we spent our last visit only walking on paper..

A little bit on the process before I jump into the big reveal..
You can read about the floor removal here, but removing the existing vinyl was just the beginning of the process.
Once we picked a finish.. Minwax's Jacobean
Found a floor guy.. we got two quotes
Negotiated with him a little.. decided it was less expensive to replace the floors in the back of the house instead of removing the vinyl floor
And set the finishing dates.. we requested to be able to get in during the weekend
It was out of our hands.
The guys began working on a Friday and we originally hoped we would be able to get in the following Friday. As is typical for most construction and finishing projects, they were a little delayed (and I didn't want to risk ruining them) so we didn't actually get into the house until Saturday morning.
The refinisher sent a round of pictures to Ben after a few days of sanding and installing, giving us a sneak peak of what was to come..
Kitchen
One of the original floors in the house, this area was covered with two layers of vinyl flooring. But luckily the vinyl came up easily when Ben removed it.
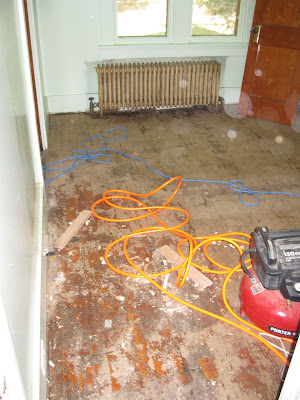 before sanding began
 after sanding
Living Room
Remember the money saving tip we discovered once the carpet was pulled up? The previous owners had the floors refinished AROUND an existing area rug.
 sanding around the perimeter
 after sanding
Office, Bedroom & Back Hall
As I mentioned above it turned out to be more cost efficient to install a new hardwood floor over the existing vinyl than removing the vinyl all together.
 new floor installed in the office
Huge improvement already, but here are some issues we ran into (and some compromises we had to make).
1. Installing new hardwood in the back of the house meant that the floor level would be higher than the front of the house. In order to create a smooth transition a saddle had to be installed. While a break in the floor and a saddle isn't always the most attractive solution, a french door that we close often, hides it from view.
2. When the floor was originally installed they used a different species of wood in almost all of the rooms- meaning the floors finished differently in every area. We contributed to the craziness of it all by installing oak in the back of the house (it's turned out to be much grainier than the pine that was used in the Living Room).
 oak
oak
 pine
pine
This turned out to work because the living areas (ie kitchen and living room) are very separate from the sleeping areas, and the different woods still work together because they are the same finish.
3. As mentioned during the garbage removal post the house is overwhelmed by radiators and installing new hardwood underneath them is not always possible. Because capping the radiators was not an option (too much $$), the wood finishers had hoped that they could lift them in some (or all) of the rooms. Unfortunately they weren't able to lift every radiator and instead had to cut out around them. Not ideal, but the truth is, you can't even tell unless you're lying on the ground staring at the foot of the radiator- and most of us don't generally have time for that.
4. The finish we picked was dark. If you look at the Minwax chart its the last brown before ebony, so I expected the floors to be really rich in color. I knew I wanted to go dark originally because the existing floor stain (as much of the other woods in the house) looked very orange to me. I knew that even if the stain was sanded out, the orange tint would remain. I figured the darker we went the less the orange would show- and I was right.. about both. The floors didn't come out as dark as I had expected (again with the different wood species and how they react to the stain), and there was a hint of orange. But luckily with the stain I picked, the orange is less of an issue- it would have driven me crazy if we went any lighter than we did!
I think considering this was the first big "investment" we made on the house, we did pretty well. But you can be the judge..
Kitchen & Mudroom
 kitchen
 mudroomThis was the hardest floor to do- it was covered in moldy/wet carpet. As you can see the floor was badly stained and the guys couldn't properly sand it because of the tightness of the space. Not ideal, but definitely not something to get upset over- especially since #1 it's still a major improvement and #2 the floor will be covered with mats, snow boots and hopefully a bench (if the current budget allows).
Living Room
 Living Room
Front Vestibule
 front vestibule
This floor came out in a way I had never seen before. I actually really like it- the little space will look great with a fresh coat of paint and some grasscloth on the walls, but the floor almost looks more like a faux bois than actual hardwood. Not sure why that happened (or what kind of wood they used), but at least I can say we might actually have a one-of-a-kind.
Side Note: Ben so nicely pointed out that every time we take a picture of Henry he's either trying to escape from the house, dig his way back to Manhattan or he's sleeping because he's exhausted from planning all of his get aways.. poor dog, I hope he'll get used to life in the suburbs.
Office, Bedroom and Back Hall
 office
 bedroom
 back hall
Henry trying to plan another escape route.. It's hard to see the floors with all of the wood surrounding. Luckily the guys installed new base moldings. We just hated what was there so we purchased and primed the molding to prepare it for installation once the floors were done.
 from the hall looking into the living room
A terrible picture of the transition from the back of the house to the front.
A few things to consider..
- If you're doing this the right way, you'd ask the floor refinisher to do some sample boards for you so you know what the exact stain is going to look like. Due to time constraints and our current address (3.5 hours south), we picked a stain and they literally started the next day.
- Keep in mind that wood is natural and old or not it absolutely isn't perfect. While imperfections in the wood or the refinishing may bother some, generally floors are covered with area rugs anyway, which helps to mask any issues that came about along the way.
- Most of our decisions were driven by money. I firmly believe that you should do something once which is why we opted for the new hardwood to begin with, but with that said our budget is not endless. We have a lot to do and very little money to do it so we had to make some sacrifices that we knew wouldn't be terrible in the end (like installing new floors in the back of the house).
- And finally, yes Ben and I have done this before.. for other people. We have never actually had our own floors refinished so it was absolutely a learning experience. It's very different when you're working with your own money, on your own schedule and making decisions with your own husband!! Just a quick example.. I am always bothered by clients who want to rush things and get them done, not taking their time to make sure the color is right or that it's the best way to do it. I've always said "be patient and it will be perfect." What a hypocrite I've become!
Remember the money saving tip we discovered once the carpet was pulled up? The previous owners had the floors refinished AROUND an existing area rug.
sanding around the perimeterafter sandingOffice, Bedroom & Back Hall
As I mentioned above it turned out to be more cost efficient to install a new hardwood floor over the existing vinyl than removing the vinyl all together.
new floor installed in the officeHuge improvement already, but here are some issues we ran into (and some compromises we had to make).
1. Installing new hardwood in the back of the house meant that the floor level would be higher than the front of the house. In order to create a smooth transition a saddle had to be installed. While a break in the floor and a saddle isn't always the most attractive solution, a french door that we close often, hides it from view.
2. When the floor was originally installed they used a different species of wood in almost all of the rooms- meaning the floors finished differently in every area. We contributed to the craziness of it all by installing oak in the back of the house (it's turned out to be much grainier than the pine that was used in the Living Room).
 oak
oak pine
pine3. As mentioned during the garbage removal post the house is overwhelmed by radiators and installing new hardwood underneath them is not always possible. Because capping the radiators was not an option (too much $$), the wood finishers had hoped that they could lift them in some (or all) of the rooms. Unfortunately they weren't able to lift every radiator and instead had to cut out around them. Not ideal, but the truth is, you can't even tell unless you're lying on the ground staring at the foot of the radiator- and most of us don't generally have time for that.
4. The finish we picked was dark. If you look at the Minwax chart its the last brown before ebony, so I expected the floors to be really rich in color. I knew I wanted to go dark originally because the existing floor stain (as much of the other woods in the house) looked very orange to me. I knew that even if the stain was sanded out, the orange tint would remain. I figured the darker we went the less the orange would show- and I was right.. about both. The floors didn't come out as dark as I had expected (again with the different wood species and how they react to the stain), and there was a hint of orange. But luckily with the stain I picked, the orange is less of an issue- it would have driven me crazy if we went any lighter than we did!
I think considering this was the first big "investment" we made on the house, we did pretty well. But you can be the judge..
Kitchen & Mudroom
 kitchen
This is Ben's favorite floor in the house.. too bad it will be covered with base cabinets shortly. Notice the guys were nice enough to unstick the kitchen window that was painted shut.. shocker!
 mudroom
Living Room
 Living Room
The refinisher was concerned because he wasn't able to get all of the stain out of the floor. In some areas you can see a hint of a darker spot, but it doesn't bother me. In fact I'm not even sure anyone would really notice unless they were actually looking for it.
Front Vestibule
 front vestibule
Side Note: Ben so nicely pointed out that every time we take a picture of Henry he's either trying to escape from the house, dig his way back to Manhattan or he's sleeping because he's exhausted from planning all of his get aways.. poor dog, I hope he'll get used to life in the suburbs.
Office, Bedroom and Back Hall
 office
 bedroom
 back hall
 from the hall looking into the living room
A few things to consider..
- If you're doing this the right way, you'd ask the floor refinisher to do some sample boards for you so you know what the exact stain is going to look like. Due to time constraints and our current address (3.5 hours south), we picked a stain and they literally started the next day.
- Keep in mind that wood is natural and old or not it absolutely isn't perfect. While imperfections in the wood or the refinishing may bother some, generally floors are covered with area rugs anyway, which helps to mask any issues that came about along the way.
- Most of our decisions were driven by money. I firmly believe that you should do something once which is why we opted for the new hardwood to begin with, but with that said our budget is not endless. We have a lot to do and very little money to do it so we had to make some sacrifices that we knew wouldn't be terrible in the end (like installing new floors in the back of the house).
- And finally, yes Ben and I have done this before.. for other people. We have never actually had our own floors refinished so it was absolutely a learning experience. It's very different when you're working with your own money, on your own schedule and making decisions with your own husband!! Just a quick example.. I am always bothered by clients who want to rush things and get them done, not taking their time to make sure the color is right or that it's the best way to do it. I've always said "be patient and it will be perfect." What a hypocrite I've become!


No comments:
Post a Comment